
HOW TO RAISE CHICKENS

Introduction
Raising backyard chickens is a hobby that your entire family can enjoy. From cute and fuzzy chicks to laying hens that have their own unique personality, the journey is one that is both fun and rewarding. There are probably a lot of questions and uncertainties that you may have about how to grow a happy and healthy flock.
Here, we will provide you with the information you need to bring home your baby chicks and raise them into fine egg producing chickens. You will also get some of the chicken basics, like nutrition and coop requirements, as well as information about keeping chickens in the winter and the molting process. We hope you find the information provided helpful in your backyard flock adventures.
Why Raise Chickens?
If you are reading this, you likely already made the exciting decision to raise your very own backyard chickens. Congratulations! You are about to embark on a great adventure that will be very rewarding. At this point, we probably don’t need to tell you why raising a flock is a great idea, but let’s do it anyway. There may be a few reasons that surprise you.
- Fresh Eggs: Did you know that the eggs you purchase in the grocery store could be up to two months old? Yes, you heard that right. If the thought unsettles you, raising chickens can provide you with fresh eggs daily.
- Nutrition: Eggs from backyard flocks have been found to be more nutritional than those purchased in the grocery store. In fact, here is what studies say:
- 7 times more vitamin A and Beta Carotene which is good for your eyesight.
- 2 times the amount of vitamin E which is good for your hair, skin, and cholesterol levels.
- 292 mg of Omega 3 fatty acid are found in a backyard egg versus 0.33 mg found in a store-bought egg.
- Lower levels of saturated fat are found in home grown eggs.
- Cruelty Free Chickens: You know firsthand how your chickens are being raised and treated.
- Education: Did you know that chickens can recognize up to one hundred different faces? It’s true. They also love to play, they dream, they mourn, and they love. And chickens will teach the whole family to appreciate where your food comes from.
- Fertilizer: If you are a gardener, prepare for the ultimate in fertilization. With its high nutrient levels, chicken manure is ideal in your garden or mixed into your compost.
- Pest Control: Chickens love to snack on bugs and even small rodents.
- Less Food Waste: Cut down on your contribution to the landfill by feeding your leftover food scraps to your girls. We will cover the do’s and don’ts a bit later in this book.
- Weed Control: Weeds like dandelions, clover, and lambsquarter are both nutritious and delicious for your flock.
- Sheer Entertainment: Chickens are funny, and each has a personality all their own. You will love watching them day in and day out.
Chicken 101
Before we get in too deep, let’s cover some terms and anatomy that every chicken owner should be familiar with:
- Bantam: A smaller breed of chicken, often called a Banty, weighing between 1 and 2.5 pounds.
- Biddy:Another word for baby chickens or hens.
- Brooder: A heated tank or box used to raise chicks.
- Brooding period: This is the period of time from hatch to adulthood in chicks.
- Broody Hen: A hen that wants to lay on her eggs and hatch chicks who can often be moody and protective of her eggs.
- Cloaca or Vent: The chamber in chickens where the excretory and reproductive tracts meet and empty.
- Coccidiosis: A disease in chickens caused by a microscopic protozoon. It can cause diarrhea and even death. Coccidiosis is transmitted by chicken waste and can be prevented by vaccination or medicated food and clean housing conditions.
- Cockerel: A male chicken under one year of age.
- Comb: The red-colored growth on top of a chicken's head.
- Coop: A house for chickens to live.
- Down: The soft, fine feathers on baby chicks before their feathers come in.
- Dusting or Dust Bath: The rolling in dust by chickens to remove mites and parasites from their bodies
- Grit: Crushed stone or sand used by chickens to help break down their food (they don’t have teeth).
- Hen: An adult female chicken over one year of age.
- Oviduct:: The tube through which an egg passes.
- Pasting: Condition when a chicken’s excretions get stuck in their down and clog their vent.
- Picking: Activity of chickens picking at each other's feathers which can be caused by boredom or close quarters.
- Pullet:: A female chicken under one year of age.
- Rooster: An adult male chicken.
- Run: An outdoor enclosure for chickens which is usually attached to the coop.
- Spraddle: A condition in which a chick’s legs are splayed apart making it hard or impossible to stand.
- Straight run Chicks that have not been sexed.
CHICKEN BREEDS
When it comes to chickens, there are hundreds of breeds to choose from. You will see that some are better layers than others and some are more tolerant of the cold. There are also breeds that are known to be family friendly and others that are eager to raise chicks of their own. Some breeds that are even known for their meat qualities.
With so many options to choose from, our breed recommender may help make your decision a bit easier. By picking the characteristics that are most important, we will narrow down your choices so you can find the right chickens for your needs. Give it a try!
BREED RECOMMENDERA PLACE TO CALL HOME
Now that you have your chicken breeds picked out, the anticipation is mounting! But, not so fast. While it’s hard to contain your excitement, it’s important to get everything set up and ready to go before bringing your cute little balls of fluff home. Let’s take a look at what you’ll need to give them the best start possible.
Location
When selecting a location for your brooder tank, keep in mind convenience, warmth, and predators (you may want to also consider your cat or dog). A spare bedroom or bathroom in the house are both good options.
Brooder Tank
We recommend a metal or plastic stock tank or even a kiddie pool. You can also puchase brooder kits or beginner poultry kits that come with much of what you need to get started. Whichever route you choose, it should be large enough to house the chicks’ food and water and for each chick to have about 1 square foot of space. We do caution the use of a cardboard box as they can pose a fire risk and they are harder to keep dry. A cardboard box also has corners, which can trap a baby chick causing a risk when they huddle together for warmth.
Bedding
Your brooder should be layered with at least an inch of bedding on its floor. Pine shavings are preferred, but any wood shavings will do, except cedar (the fumes given off by cedar have been noted by some to be toxic to chicks). The pine shavings will not only absorb water spills and waste, but it will also give your babies some extra footing, preventing spraddle.
Spraddle is the condition where a chick’s legs are splayed apart making it difficult or impossible for the chick to stand. This condition can be caused or exacerbated by a slippery brooding environment.
The bedding in your tank can be spot cleaned every day and should be fully changed every 2-3 days, depending on how many chicks you have and the size of your brooder. If not cleaned in a timely manner, your chicks will begin to peck at their waste. A dirty tank can also increase the chances of coccidiosis.
Heat
When you first lay eyes on your baby chicks, you will notice that they are covered in a soft, fuzzy layer of down. This down will eventually give way to feathers, but until then, they need warmth. The best way to provide this warmth is with a heat lamp on one side of the tank, leaving the other side cooler so they can roam as they need.
When picking your bulb, opt for red light to protect their delicate eyes. Besides protecting their eyes, chickens do not perceive red lights as daylight as they do white lights. The difference between the two can influence your chicks sleeping patterns and have an effect on their growth and their egg production as hens.
The temperature in the brooder should be 90-95 degrees for chicks up to 2 weeks old. To monitor the heat, place a thermometer on the side of the tank, near the hanging heat lamp. In the weeks to follow, you will want to reduce the temperature in the tank by 5 degrees each week. To accomplish this, raise the heat lamp and keep an eye on the temperature. The chicks will tell you if they are too warm or cold based on where they are hanging out in the tank. If they are all huddled under the lamp, they are too cold and if they are on the edges, they are too hot. You should see them roaming around all over the tank.
Food
Your wee ones are going to need food that is packed with all of the protein, vitamins, and minerals they need to grow into strong and healthy chicks. We recommend a chick starter or grower for the first 18-20 weeks to ensure that your chicks are getting exactly what they need.
If you purchase your chicks at a Murdoch’s store, they will be unvaccinated. For non-vaccinated chicks, we recommend an FDA-approved medicated feed, to prevent coccidiosis (which we talked about above). However, if you have purchased vaccinated chicks, then you are fine to feed your babies a nonmedicated chick starter.
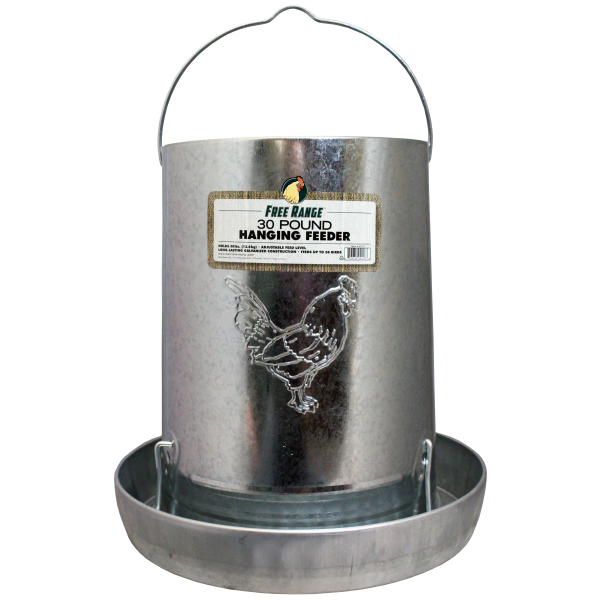
Feed should be placed in a chicken feeder or bowl that is easy to clean, easy for the chicks to reach, has enough room for each chick to feed at the same time, and one they can’t get stuck in. You will want to make sure that your chicks have access to food at all times. It is a good idea to place the food somewhere between the water and the heat lamp. This way, your chicks will come across the food every time they go to get water.
Water
Fresh water should be offered to your chicks at all times, changing the water every day, as you will soon see that they will quickly soil their water with shavings and droppings. You may even choose to change your water a few times a day, especially with a larger group of chicks.
Electrolytes and probiotics can also be provided to your chicks through water. These come in bulk packaging or in pre-measured quantities that can be diluted with water. The electrolytes will provide energy and help to keep your wee ones hydrated while the probiotics will help aid in digestive health. The two can be used alone or combined for ultimate health. (Be sure to follow the manufacturer’s directions and recommendations.)
Again, your chicken waterer should be short enough to be reached by your chicks and have enough room for each chick to drink at the same time. Also make sure that the water isn’t deep enough for a chick to fall in and drown. Water should be offered at all times and placed away from the heating lamp. If your chicks have a hard time finding the water when you bring them home, feel free to gently dip their beaks into the bowl.
Once you have these basics in place, you are ready to welcome home your new chicks!
Chicken Supplies


BRINGING HOME BABIES: THE FIRST WEEKS
Today is the day you have been anticipating - the day you bring home your chicks! And lucky for you, you have everything ready for them to arrive home.
Getting Settled
From being taken out of their brooder and placed in a box and then the car ride home, your chicks are going to be a bit stressed out. For this reason, it is typically a good idea to only give them access to water. To help your chicks find their water, you may have to pick them up and gently dip their beaks in to encourage them to drink. Hydration is very important in the first few weeks. After an hour or so, feel free to put their food back into their tank.
As your new chicks get settled into their new home, it’s important to keep a close eye on them for the first couple of weeks. Happy and healthy chicks will be busy and will eat, sleep, and poop. Pay close attention for signs of coccidiosis, pasting, and that they are not too hot or too cold.
Coccidiosis
Coccidiosis, as we briefly mentioned earlier is a disease that affects the intestines of chickens and causes loose droppings. The parasite will damage the gut wall and can be harmless or could also be life threatening. Signs of coccidiosis include lethargy, not eating, and a hunched posture. If you suspect the illness, it is important to contact your vet ASAP. And since the illness can be passed through fecal matter, it is also important to remove the sick chick and clean the tank immediately to prevent spreading.
A clean tank will help in preventing coccidiosis. Probiotics have also been said to help in preventing coccidiosis, but further research is needed to know how much it truly helps.
Pasting
Pasting happens when a chick’s vent is pasted shut by its droppings, preventing them from making a bowel movement. This can be caused by switching foods and poor hydration. If this happens, it is important to remove the paste immediately as it can be life threatening. A warm, wet cloth or q-tip should easily do the trick. Keep in mind that it is more common that your chick might get a bit of their droppings on their down, which isn’t pasting, but a bit unsightly. You can choose to clean them up or just leave it, just as long as their vent is free and clear.
Temperature
When it comes to the temperature in the tank, you will know right away when tank is too hot or too cold based on your chick’s behavior. If your little flock is huddled under their heat lamp, they are too cold. And just the opposite, if they are all scattered to the outskirts of the tank, it is too warm for them. You can simply adjust the heat lamp accordingly until they are moving about, all over the tank.
Bonding
Of course, you want to form a bond with your little flock but start off slowly, so you don’t stress them out. When you visit your chicks, which you will do frequently (trust us, they are hilarious!), talk softly to them. They even enjoy a soft whistle. Then, after a week or so, you can start handling them.
At first, this will be a bit challenging. They will run and jump over one another, trying to escape your reach, as you would expect. Just as you would if someone you didn’t really know, who was several times your size, tried to scoop you up. When you finally catch one, make sure to keep a gentle grip so you don’t hurt them. You can pet their little heads and the fuzzy backs too. We are willing to bet that one will even fall asleep while you hold them, which is so sweet. And remember, just like humans, some chicks are a little more outgoing than others but the more time you spend with them as chicks, the more docile they will be as adults.
Just For Fun
When your chicks are about 3 weeks old, you can introduce a little roosting bar. This can be done very easily with scrap wood. All you need is a small dowel or 13 stick and a block. You can also get fancy and use a couple of triangular pieces of wood and bore holes. And, tah-dah, a mini-roosting bar for your little fuzzies to practice. Of course, they will fall off. And when they do, just put them back on and soon enough, they will catch on. You will even catch them lined up sleeping happily.
At this age, when the days become a bit longer and warmer, you can even take your chicks outside on a field trip. We do recommend taking the brooder with you or putting up a small enclosure, because your little fuzzies are fast on their feet. You will love watching them play and explore in the great outdoors.
About now, you will also start to notice that they are growing more and more feathers. You can also see changes in their combs and wattles which are becoming bigger and redder in color.
THE TEENAGE YEARS: SIX TO EIGHT WEEKS
Don’t they just grow up so fast? It seems like only yesterday you brought home those peeping, fuzzy little balls of cuteness. Now your birds have hit their “teenager” stage and that little brooder tank isn’t going to hold much longer. You may have already noticed that your young ladies are quite literally trying to fly the coop. With their down mostly gone, and their feathers coming in nicely, it is about time to move your flock to the great outdoors. Depending on your temperatures however, you may need to hold out a bit longer until your girls are fully feathered out, which can be up to 10 weeks. But once they are fully feathered, they can withstand temps as low as 30 degrees, even at their young age. And cold hardy breeds can take even bigger dips. You can also choose to add a coop heater to give the girls a bit of extra warmth until they grow a bit larger.
When moving your chicks outdoors, you have a lot of planning to do. Some of the decisions you will have to make include the location of coop, the size of the coop, ventilation, and much more. So, let’s make sure you are well informed and ready for moving day.
Location, Location, Location
The location of the coop is a big decision. Since you will be visiting the coop every day for feeding, you should pick a spot that is convenient to the house. Somewhere close, but not too close, since chickens will draw insects and can be a bit smelly. And ideally, you want to be able to see them, so you can make sure all is well, and spot predators. Here are some more considerations:
- Running electricity
- Sun for warmth
- Access to shade
- A windbreak in the winter
- A level spot with good drainage
- Foraging access
Size Matters
When it comes to the size of the coop, you will want at least 3 square feet of space in the hen house for each full-size chicken. Since bantams are ⅔ the size of full sized breeds, you can reduce your coop size accordingly. In the run itself, you want to give your girls at least 8-10 square feet each. However, if your flock is going to spend most of its time enclosed, you will want to add more area to the run. If your space is too small, chickens can become stressed and bored and begin pecking at each other. That is something you do not want to deal with, trust us.
The Perch
Chickens love to perch up high, which is instinctual. To protect them from predators at night, chickens in the wild would sleep high up in the trees. So naturally, your coop must include a perch or two, depending on the size of your flock. Inside the hen house, the perch should be the highest spot, above the nesting boxes, and there should be enough space for each hen to sleep. You can also add one or two roosting bars outdoors in the corners or across the run.
Similar to a roosting bar, is a swing. Yep, you heard right. A swing in the coop will keep boredom at bay and both you and your chickens will love the addition.
Nesting Boxes
Nesting boxes provide a safe and somewhat private area for your hens to lay eggs. The rule of thumb when it comes to nesting boxes is to have one per 3-4 chickens. However, you will probably notice they will only use one. But it’s best to let them make this decision.
Since standard chickens are about 12” around, your nesting boxes should be no smaller than a square foot as well. We recommend a bit larger to give them plenty of room to be comfy. They should also have at least a foot opening, so they can get in and out with ease. And a small lip on the front of the nesting box will prevent your flock from making a mess of the bedding.
You will have to keep your nesting boxes clean, so keep that in mind when you are considering what to use during construction or purchase. Plastic or metal is ideal since neither are absorbent and will be easy to disinfect. Wood is of course more common, but just a bit harder to clean. Either is fine however. You can also feel free to get creative and use things like dish pans, milk crates, or even a Murdoch’s bucket.
The nesting boxes should be lined with wood shavings, sawdust, or even grass clippings. Just don’t use anything with chemicals that could harm your girl’s lungs. Some people also opt for rubber mats or nesting mats, which are also great choices. Some advise against hay because it can mold quickly, but that is true of all-natural materials, so keep that in mind. If you are using shavings or hay, or anything that can compost, you will need to change your bedding a bit more often.
Ventilation
Ventilation is essential in a coop since moisture can cause mold. You will therefore want your coop to be able to efficiently exhaust heat, humidity, moisture, and odors, like ammonia. Ammonia is expelled from chickens’ waste and can build up in the winter, since they are spending more time in the coop. We recommend as chimney to accomplish this, but an eave vent will also work fine. Just be sure that you can adjust the vent as needed between warmer and winter months.
Time For Treats
The teenage years also mean that your birds are ready for possibly the best thing in a chicken’s entire existence...treats! So, put on your cape, because you are about to be a superhero. But not so fast. When you are feeding chickens anything but their feed, they are going to need grit. We defined grit above, but as a refresher, grit is used to help your chickens break down their food in the absence of teeth. Grit is normally crushed stone and will aid in digestion. It also comes in different sizes, for different age ranges of chickens.
As far as treats go, your chickens will love all sorts of things from mealworms to kitchen scraps. But easy does it, the treats should only make up 15% of their daily diet. Here is a snapshot of what is ok for your girls to snack on:
- Store purchased chicken treats like mealworms and treat mixes
- Leafy greens like cabbage, lettuce, and spinach. You can even hang a ball of cabbage or other veggies from the coop and watch your girls play tetherball.
- Bread can be a great occasional treat, but no mold please
- Corn in any fashion - they love it all!
- Fruits like apples (remove the seeds, they are toxic!), berries and melons, which are a favorite
- Grains like rice and wheat
- Oatmeal raw or cooked, which is a nice treat during the cold months
- Veggies like peas, broccoli, carrots (cooked or shredded), cucumbers, pumpkins, squash, sweet potatoes, and tomatoes
But, there are some things to avoid as well:
- Anything super salty
- Processed foods
- Raw potato peels which can be toxic
- Garlic, onion and other strong-tasting foods, which won’t hurt, but will give your eggs an interesting taste
- Avocado pits and skins which are also toxic
- Coffee or coffee grinds
- Chocolate which can be toxic
- Greasy foods
- Anything spoiled or rotten
- Raw meat which can lead to cannibalism
- Greasy foods
IT’S TIME FOR EGGS!
By now your little chicks have grown into fine hens. And at long last, the time you have been waiting for is on the horizon, fresh eggs. At 18 weeks it will be time for you to move your flock from chick starter to layer feed. Layer feed should have at least 18% quality protein, amino acids, and vitamins and minerals like A, D, E, and K, and the gamut of B-complex vitamins. But you must hold off until 18 weeks as the extra calcium can damage their kidneys permanently.
The main difference between grower feeds and layer feeds is calcium levels. Chickens need the extra calcium to lay eggs and if they don’t have enough, they will have to pull calcium from their bones to produce eggs. Your flock will also benefit from micro and macro minerals and pro and prebiotics. At this point layer feed should be 90% of your flock’s diet. If you give them too many treats or scratch grains, you will see diminished egg production.
Outside of layer feed, you can also begin to add oyster shell as a free choice calcium supplement. Oyster shell will help ensure strong eggshells, and your girls will eat as much as they need, based on their individual requirements. And don’t forget the grit as it is still required and will be, forevermore.
From 6 months (give or take) to 6 years, you can expect your chickens to give you eggs. And we’re guessing you have questions about that, too right? How many eggs will you get? How big will they be? What color? Ok, ok, let’s dive in.
Just How Many Eggs?
I’m sure you really want to know just how many eggs you can expect from your girls, right? Well, several factors come into play regarding egg production. The breed, nutrition, living space, daylight and the time or year, molting, and age all play a role. Up to this point, we have discussed almost all of these factors with the exception of daylight and molting. But, the next chapter will discuss both, so hold tight, or skip ahead and come back if you just can’t wait.
It takes about 26 hours for a chicken to produce an egg. But given the factors we just mentioned, you shouldn’t necessarily assume that rate of production. A good rule of thumb is to take the number of hens you have and multiply that number by .75. That is the number of eggs you can expect each day. So, 8 hens will give you 6 eggs a day on average.
Egg Color
When it comes to egg color, we are sure you have questions. How do you know what color eggs your hens will lay? Do they all taste the same? So, let’s dig in.
First things first. Did you know that there are only 2 colors of eggs? That’s correct. There are white eggs and blue eggs. In the beginning, all eggs start out white. It’s only in the last 2 hours of their journey that some eggs will pick up pigments.
Protoporphyrin, which is a brown colored organic compound, is responsible for the brown coating on eggs. Depending on the breed of chicken you have, it maybe be darker or lighter in color. And either way, it doesn’t penetrate the shell. The next time you have brown eggs, go ahead and use the rough side of a kitchen sponge on it. You will notice that you can wash that color right off. And when you crack it open, it will be white inside as well. There might also be brown spots on your eggs, those are the product of red blood cells breaking down and speckling the eggs.
When it comes to blue and green eggs, we have the pigment oocyanin to thank. Oocyanin is actually a product of bile that makes its way into the oviduct, penetrating and dying the eggshell. You will notice that if you crack a blue or green egg, you will see that the color indeed makes its way to the other side of the shell as well.
Now if you looked at our breed recommender, you saw that we have noted the color eggs that are associated with each chicken breed. But what if your chicken isn’t on that list? The answer is in her ears!
Yes, you heard that right. Oddly enough you can tell what color egg a chicken will lay by looking at her ears. Hens with red ears will lay brown eggs and hens with white ears will lay white eggs. Unfortunately, when it comes to the blue and green eggs though, ears won’t help very much as they are not tied to egg color.
So, let’s talk taste. There is no hard, documented research that proves eggs of a different color taste differently. But you will find that some people have their opinions. What we can tell you is that you will love the taste of eggs that are only hours old. The yolks may even surprise you at first with their dark, almost orange color. This is a good sign! This dark yellow or almost orange color is a sign of a healthy chicken. You may also notice a little speck of blood from time to time. Don’t fret. This isn’t a fertilized egg, just a ruptured blood vessel which is normal and harmless. Feel free to pick it out if you like.
Egg size will vary based on your chicken breed and is based mostly on genetics. In general, you can expect that smaller chickens will in fact lay smaller eggs. But age also plays a role. Younger chickens will lay smaller eggs. As they age, they will then even out to an average size for their breed and then as they age, the egg size will increase as they lay less frequently.
Eggs are also classed into sizes by their weight.
- Small: 1.5 oz
- Medium: 1.75 oz
- Large:2 oz
- X-Large:2.25 oz
- Jumbo:2.5 oz
Should I Refrigerate My Eggs?
Unfortunately, we cannot answer this question for you. But, let’s discuss the research so that you can make your own decision.
First, we have the recommendations of the US Food and Drug Administration (FDA). The FDA guidelines recommend that you only purchase eggs that are refrigerated and keep them refrigerated thereafter, until they are consumed. Eggs should only be stored in their original packaging and the packaging should not be reused. When you buy eggs in the grocery stores, it is required by law that they are thoroughly washed and kept refrigerated.
The European Food Safety Association (FSA) however has a different opinion. According to their research, eggs are very safe to consume. When eggs are laid, they are covered in what is referred to as a bloom. The bloom coats the egg and provides a barrier to bacteria and microbes. It is when this bloom is removed by washing, that eggs must then be refrigerated, until they are consumed. But up until that point, the FSA deems them safe to be unrefrigerated.
Unwashed eggs can be stored in an airtight container in the refrigerator for up to 3 months. You can separate the white from the yolk and freeze your eggs. To use them, you simply defrost and blend them back together.
MOLTING: THE NAKED TRUTH
Just when you think you have this chicken thing nailed, your flock will throw you a curveball around 16-18 months of age. One day you will walk out to the coop and see feathers a flurry. Don’t panic! You are about to experience your hen’s first molt.
What is Molt?
The science is pretty simple actually. At about 16-18 months old and then annually, and usually in the fall, the shortening day length will tell your birds it’s time to molt. Your hens will usually take a break from laying, lose their feathers and replace them with new. At this point your hens are restoring their nutrient reserves for another season of laying and regrowing a whole new set of feathers as well. Molt also allows the rejuvenation of the oviduct to allow for a productive spring.
What to Expect
The molting process will start at their heads and continue to their tails. You will notice feather loss and bald spots as the old feathers are pushed out by their new growth. It is important to note that this process will not go out of order. So, if you have a chicken with feathers missing in other areas, you will need to consult a veterinarian or chicken expert.
How Long Will it Take?
Depending on your breed, this process can take anywhere from 2-6 months. And typically, it won’t happen at the same time for every bird in your flock. One way to get an idea on how long it will take is to look at your flock individually. If you notice just a feather here and there, you can expect that the molt can take a while. On the other hand, if you see larger balding patterns, the process will go faster. One way to help speed up the process is to turn off the light in the coop for 6 weeks or so. If your molt happens to take place in the dead of winter, you will want to provide a heater, since your flock doesn’t have feathers to keep them warm. If you are using a brooder lamp (which we don’t recommend due to fire hazard), opt for red light. The red light will allow them to tell the difference between day and night.
Feathers are approximately 85% protein and growing them all back in increases your hens’ need for this nutrient. Feeding a high-protein feed with amino acids and mineral combinations to encourage feather regrowth and protect exposed skin is one of the best things you can do for your girls. Look for a layer ration with at least 16% protein or even a meat ration at 18% protein. You can also supply a feather fixer poultry feed designed specifically to help your girls get through molt faster. This can be given free choice along with oyster shell and grit.
Since protein intake is super important during molt, you will want to reduce the amount of scratch grains you provide as it will lower your hens’ protein intake. You can however provide them with some yummy snacks like mealworms, black oil sunflower seeds, and tuna or other fish. There are also quite a few protein snack recipes on the web that can be easy to make and delicious.
Lastly, your flock’s new feathers are fragile. It is important to avoid handling them when possible and to limit their stress during this time.
FACING WINTER WITH CHICKENS
Chickens are hardy birds. And if you are living near a Murdoch’s Ranch & Home Supply store, chances are you have cold hard hens. But there are still some things you can do to prepare for the cold winter months in the Rockies. Your biggest enemies during the cold are drafts and moisture, since both can cause frostbite on your flock’s combs and wattles. Luckily, winterizing your coop will help tremendously, keeping your flock healthy and happy until the thaw.
Drafts
Drafts in the winter will definitely make for unhappy chickens. They can also cause health concerns like frostbite. Be sure to look for holes or gaps around your windows and doors and seal them up tight.
Ventilation
As we discussed previously, ventilation is important in your coop. The vent should be placed away from direct wind and be in a place where the air will not directly hit your girls. Usually at the highest part of the coop is the best option.
Insulation
Insulating your chicken coop will work wonders when it comes to heat retention. However, chickens will go to great lengths to eat insulation as well. So, how you insulate your coop is important. Ideally, foam insulation sheets would be built into your coop walls during construction. But, if you haven’t done this, you can use insulation sheets or standard insulation, covered with a few layers of cardboard. Or, you can even use a few layers of cardboard by themselves as insulation. Whichever way you choose to go, just make sure to tack everything down well so the chickens do not eat the insulation.
Bedding
Bedding is another great way to increase the temperatures in your coop. You can increase the amount of pine shavings or straw that is used in your nesting boxes. Now, the dampness can create mold in any natural bedding materials, so make sure you are checking for mold on a regular basis. Mold can cause respiratory issues, which you do not want. You will also want to check on the ammonia levels in the coop. As we mentioned, chicken manure gives off ammonia and, in the winter, with increased bedding, it can be problematic. As a test, bend over to eye level with the bedding and if your eyes are burning after 5 minutes, it’s time to change it out.
Heaters
You can find many opinions and much research about heaters in a chicken coop. Many say that chickens, especially cold hardy chickens, do not need heaters in their coop. Others however are proponents of using heat inside the coop. While we can’t make this decision for you, we can give you some advice on heaters.
Do not use brooder or heat lamps in your coop as the fire danger is too great a risk. Instead, opt for oil filled or flat panel heaters without heating elements to reduce the risk of fire. There are also supplies like heated perches and mats that can help your chickens from getting frostbite on their feel. And remember that chickens will huddle together and create their own warmth.
Feeding and Watering
Over the winter months, after a long laying season, your flock is focused on repair. In order to help facilitate their repair, they will require one and a half times more feed than normal. This extra food will also lead to longer digestion, which will help to keep them warm. Another trick to create a little extra heat is to give them cooked oatmeal in the mornings and corn in the last half hour of daylight.
If food intake is increasing, then so will water consumption. And just like the extra food, chickens will drink about one and a half times more water over the winter months. Just be sure to keep the water outside to prevent moisture buildup. You will also need to replace the water often or use a water heater to keep it from freezing.
A Few Extra Tidbits
When it comes to winter, there are a few extra special steps you can take to make your girls a bit more comfortable:
- Use bag balm or petroleum jelly on their combs and wattles to protect frostbite.
- Throw some snow or straw on the snow in their run so they don’t have to walk on the snow as much.
- Don’t keep them closed up! They can figure out if they want to be inside or go outside for some fresh air, we promise.
- Hang a cabbage ball or other veggies from a string and let them bat it around and nibble on it. It will keep the boredom away.
- Make sure they have more than enough room to roost in their coop.
What About the Eggs?
It is natural for egg production to drop off significantly in the winter. As you recall, there are many factors in egg production. One of which is daylight. Since the daylight hours go from 14.5 hours a day in the summer to 9.5 in the winter, chickens will naturally stop laying eggs and focus their attention on staying warm. But don’t forget that there are certain chicken breeds that will lay right through winter.
There are also ways to force chickens to continue to lay. Either way, the choice is yours and there is plenty of information available about these methods. We encourage you to make the right decision for you and your flock.
In an eggshell, raising chickens is great fun for your entire family. Chickens are fairly low cost and low maintenance to raise. You will love having fresh eggs right out your back door. And you will love the countless hours of entertainment they provide. You might even watch way less television! We hope that you have the best time raising your flock of happy and healthy chickens. And we are here to answer your questions, should you have them, so feel free to stop in to your local Murdoch’s Ranch & Home and talk to one of our experts.

RESOURCES
Arcuri, Lauren. “Top 10 Tips for Keeping Your Chickens Healthy Through the Winter.” The Spruce, 25 Oct. 2017, https://thespruce.com/keep-chickens-in-winter-3016590.
Bellomo, Rheanna O’Neil. “This Insane Fact About Store-Bought Eggs Is Going Viral.” Delish, 14 Sept. 2017, https://delish.com/food-news/a45655/the-scary-thing-you-never-knew-about-grocery-store-eggs/.
Brenda. “How Many Eggs Does a Chicken Lay per Day?” The Well Fed Homestead, 8 July 2013, https://delish.com/food-news/a45655/the-scary-thing-you-never-knew-about-grocery-store-eggs/.
“Choosing the Perfect Chicken Coop - Features and Extras.” Backyard Chicken Coops, 2 Nov. 2017, https://backyardchickencoops.com.au/choosing-the-perfect-chicken-coop.
“Coccidiosis.” The Chicken Vet - The Home of Healthy Chickens, https://chickenvet.co.uk/health-and-common-diseases/coccidiosis/index.aspx.
“The Definitive Guide To Keeping Chickens In Winter.” The Happy Chicken Coop, https://thehappychickencoop.com/the-definitive-guide-to-keeping-chickens-in-winter/.
“Feeding Your Chickens Table Scraps.” Murray McMurray Hatchery, 25 May 2015, https://blog.mcmurrayhatchery.com/2015/05/25/feeding-your-chickens-table%C2%A0scraps/.
“First Few Days and Weeks With Baby Chicks.” Backyard Chicken Coops, 18 Oct. 2017, https://backyardchickencoops.com.au/first-few-days-and-weeks-with-baby-chicks/.
Garmen, Janet. “Help! My Chickens Are Molting.” Timber Creek Farm, https://timbercreekfarmer.com/help-my-chickens-are-molting/.
Hamre, Melvin L. “Rearing Chicks and Pullets for the Small Laying Flock.” University of Minnesota Extension, https://extension.umn.edu/food/small-farms/livestock/poultry/rearing-chicks-and-pullets-for-the-small-laying-flock/.
Lane, Jessica. “Backyard Chickens 101: Everything You Need to Know about Laying Hens.” The 104 Homestead, https://104homestead.com/laying-hens/.
Lane, Jessica. “Safe Egg Handling Practices.” The 104 Homestead, 25 June 2017, https://104homestead.com/egg-safety/.
Lane, Jessica. “Why Have My Hens Stopped Laying?” The 104 Homestead, https://104homestead.com/laying-hens-stopped-laying/.
Leonard, Jayne. “20 Convincing Reasons to Keep Backyard Chickens.” Natural Living Ideas, 14 July 2015, https://naturallivingideas.com/20-convincing-reasons-to-keep-backyard-chickens/.
Lisa. “How Old Is the Average Supermarket Egg?” Fresh Eggs Daily®, 21 Jan. 2016, https://fresheggsdaily.com/2016/01/how-old-is-average-supermarket-egg.html.
Lisa. “Weeds 101: A Nutritious, FREE Treat for Your Backyard Chickens.” Fresh Eggs Daily®, 24 Feb. 2012, https://fresheggsdaily.com/2012/02/winter-weeds-101.html.
Lissa. “Cold Weather Chickens – 8 Things NOT to Do to in Winter.” My Pet Chicken Blog, 29 Jan. 2018, https://blog.mypetchicken.com/2012/11/16/cold-weather-chickens-8-things-not-to-do/.
Manion, Bonnie Jo, and Robert T. Ludlow. “How to Determine Your Flock Size and Space Requirements.” Dummies, https://dummies.com/home-garden/hobby-farming/raising-chickens/how-to-determine-your-flock-size-and-space-requirements/.
Robles, Kathryn. “Are Your Chickens Molting? Here’s What You Need To Know.” Farming My Backyard, 3 Nov. 2017, https://farmingmybackyard.com/chickens-molting/.
Sheikh, Farhan. “4 Ways to Insulate Your Chicken Coop for Extreme Weather Conditions.” The Poultry Guide, 23 Apr. 2013, https://thepoultryguide.com/insulating-chicken-coop-for-hot-and-cold-weather/.
“Terms Every Chicken Owner Should Know.” Southern States, https://southernstates.com/articles/poultry-care-chicken-terms.aspx.
“Top 10 Chicken Nesting Boxes.” Countryside Daily, 12 Jan. 2018, https://backyardpoultry.iamcountryside.com/coops/chicken-nesting-boxes/.
“Where to Build Your Chicken Coop: 6 Critical Factors.” Chicken Coop Designs, 24 Feb. 2015, https://coopdesignplans.com/where-to-build-your-chicken-coop/.